
Intro: In this thread you will learn how to replace your brake master cylinder(MC). The procedure is very trivial to most of you mechanically inclined members but to some may need a helping hand. As a new board member I would like to do my part for the crxcommunity. Thanks to you ladies and gentlemen, I am able to restore my crx back to its former glory. ")
A good indicator to know you have a faulty MC is if you have a spongy brake pedal. At a stop light you may notice your brake pedal slowly squish to the floor. Some other symptoms that can cause a squishy brake pedal is after a brake pad replacement. Such as, the rear brake pad shims do not line up with the piston's cross slot in the caliper. In addition, a bad line bleed, cracks in the hard/soft lines, and when the fluid reservoir runs dry between line bleeds. These are very common problems mechanics overlook, sometimes do it on purpose to rip you off. I can't name all the common symptoms but replacing the MC is a good place to start. Its inexpensive and very easy to do with basic tools.
Materials:
- 3/8" 6" extention
- 3/8" 3" extention
- 3/8" socket wrench
- 10mm box wrench or
- 10mm flare wrench
- 12mm ratcheting wrench (makes life easier)
- 10mm socket
- 12mm socket
- Torque Wrench
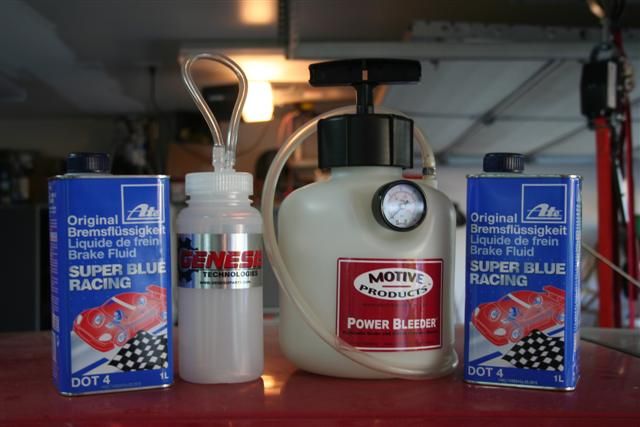
- DOT 4 Brake Fluid
- Assistant
- cardboard
- couple rags
General Warnings: Always use proper hand / eye protection. Note that brake fluid is very corrosive on paint so you don't want to get this stuff on your nice fenders or your windshield plastic trim. Always use a magnetic tray to put your nuts and bolts in, and be careful where you place your tools because brake fluid can be on it. I take no responsibility for any type of liability issues, etc.
- First thing you should do is cover your floor space with a nice square piece of cardboard. Place a few rags underneath the MC to catch some of the brake fluid that will drip, and unplug the two electrical wires.
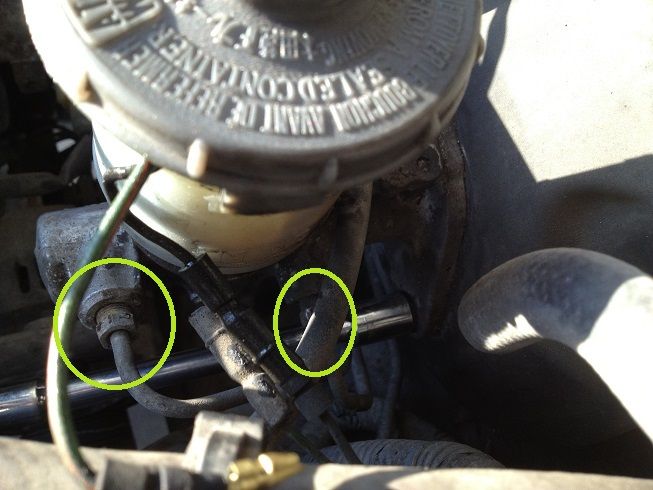
- Begin by breaking these two nuts loose using your 10mm flare wrench (best choice). If that's unavailable, a 10mm box wrench will work; however, these are notorious to round off head bolts. So keep that in mind.
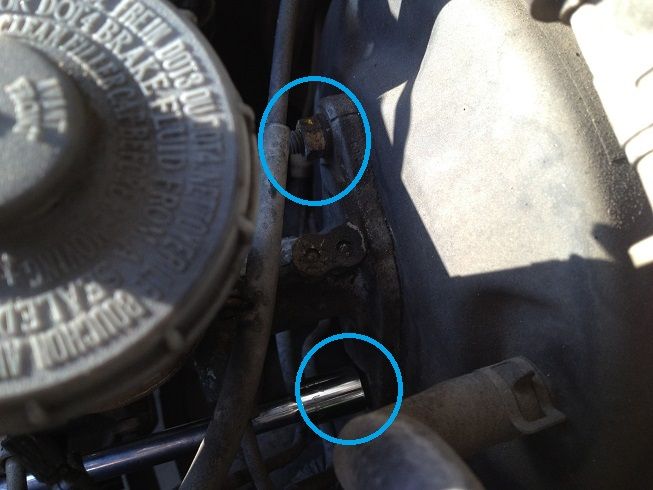
- You can now remove these two nuts. You may start with the bottom using a 6" extention + 12mm socket.
- The top one is easily accessible with a 12mm ratcheting wrench or a 3" extention + 12mm socket.
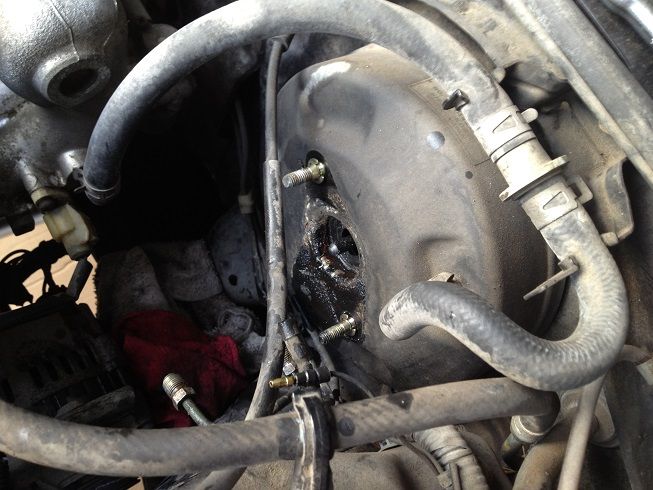
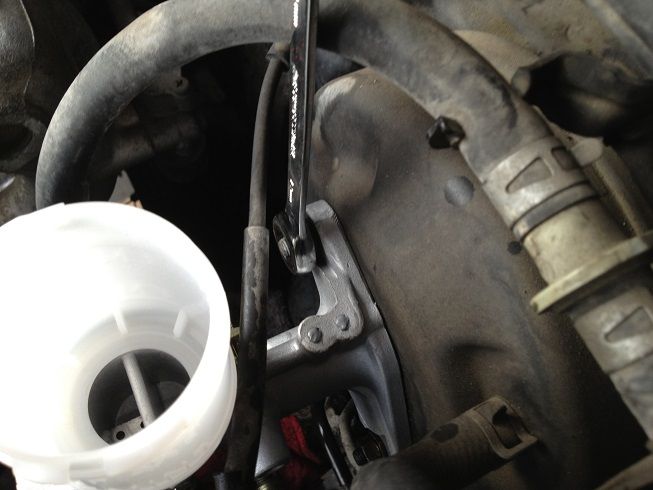
- With some wiggling, you are able to remove the Brake master cylinder assembly. Be sure to remove the proportion valve's rubber seal if its inside the brake booster because you don't want two of them when you install the new one. In this pic you can see where the MC was leaking fluid. In mine, it was coming out of the proportion valve going into the booster...
- A brand new Brake Master Cylinder. Remove those blue valve plugs and the yellow proportion valve cover. Now its time to bench bleed this thing.
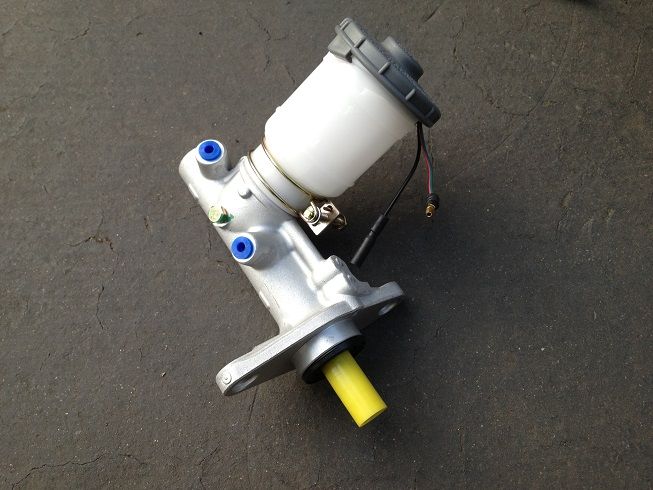
- Bench bleeding is a mandatory process in order to remove all air present in the system. Think about a windex spray bottle. The spray system will not work until you pump the trigger a few times because air is still in the tubes. lol worst analogy, but you get the idea.
- Normally, in bench bleeding you will need to place this in a vice, then use your palm to thrust the proportion valve. It is very ineffective. We will not do this because there is a much easier way. It's not much of a trick but we will just install the new MC and use the brake pedal to bench bleed it. Gotta love how crx's have lots of space to work with. lol nissans.
Installation is just the reverse order. Replace the lock washers and nuts. Torque those to 15nm or 11lb-ft.
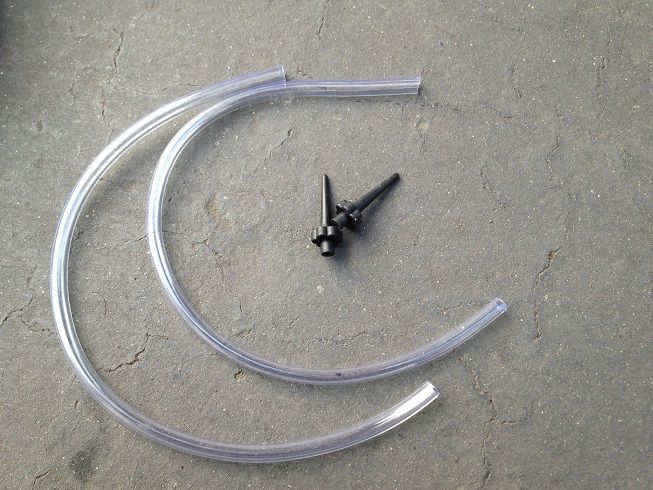
Once the MC is installed this is what you'll need. All it is just some aquarium tubing (ace hardware) and some glue stick nozzles(michaels/orchard supplies) Some MC kits come with it.
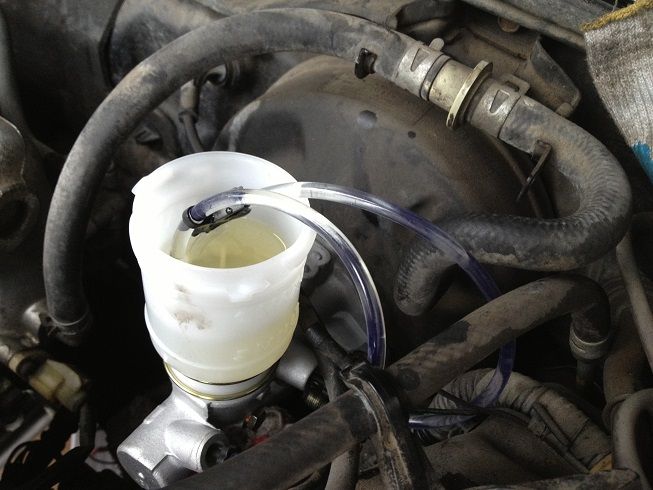
Fill the resevoir(max line) with your prefered DOT4 Brake fluid and completely submerge the aquarium tubes in the fluid. This will prevent air from entering the tubes when the brake pedal is released. Pump and release the brake pedal slowly down to 3/4 pedal. Try not to fully depress the brake pedal because you may damage the seals.
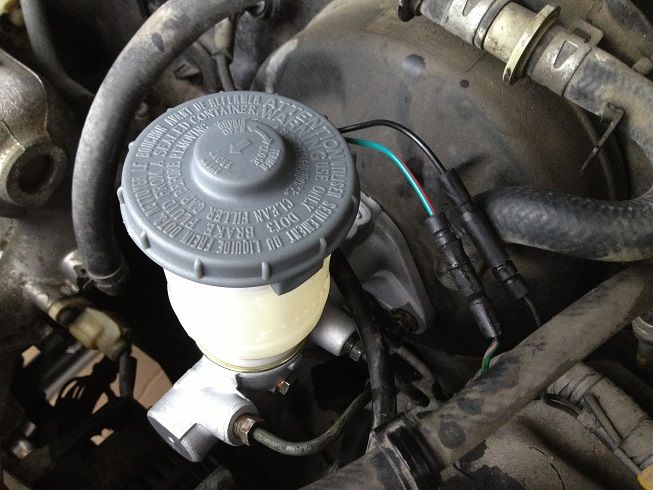
Remove the bench bleed device and re install the two brake line valve screws. (see pic1). Replace the reservoir strainer and top off fluid again. When replacing the cap, observe that the arrow is pointing forward, that is, away from the firewall. Lastly, reconnect the two electrical wires.
A good questions might come up: Should i use teflon tape on these connections to prevent leaks?
The answer is no. Brake Fluid eats up teflon tape. These connections are tapered so it will seal properly without any type of sealant.
Congratulations you have successfully replaced your MC. I recommend line bleeding each brake caliper to ensure the entire system flushed out. Although, you can get away with it just doing the MC. Not the best advice and I wouldn't recommend that especially since brakes is an important component keeping you alive. The proper bleed sequence Rear passenger, Front Driver, Rear Driver, and Front Passenger.
I hope that this tutorial will guide you the next time you need to replace your MC. I love reading your comments so please leave any feedback or anything that I missed.
A good indicator to know you have a faulty MC is if you have a spongy brake pedal. At a stop light you may notice your brake pedal slowly squish to the floor. Some other symptoms that can cause a squishy brake pedal is after a brake pad replacement. Such as, the rear brake pad shims do not line up with the piston's cross slot in the caliper. In addition, a bad line bleed, cracks in the hard/soft lines, and when the fluid reservoir runs dry between line bleeds. These are very common problems mechanics overlook, sometimes do it on purpose to rip you off. I can't name all the common symptoms but replacing the MC is a good place to start. Its inexpensive and very easy to do with basic tools.
Materials:
- 3/8" 6" extention
- 3/8" 3" extention
- 3/8" socket wrench
- 10mm box wrench or
- 10mm flare wrench
- 12mm ratcheting wrench (makes life easier)
- 10mm socket
- 12mm socket
- Torque Wrench
- DOT 4 Brake Fluid
- Assistant
- cardboard
- couple rags
General Warnings: Always use proper hand / eye protection. Note that brake fluid is very corrosive on paint so you don't want to get this stuff on your nice fenders or your windshield plastic trim. Always use a magnetic tray to put your nuts and bolts in, and be careful where you place your tools because brake fluid can be on it. I take no responsibility for any type of liability issues, etc.
- First thing you should do is cover your floor space with a nice square piece of cardboard. Place a few rags underneath the MC to catch some of the brake fluid that will drip, and unplug the two electrical wires.
- Begin by breaking these two nuts loose using your 10mm flare wrench (best choice). If that's unavailable, a 10mm box wrench will work; however, these are notorious to round off head bolts. So keep that in mind.

- You can now remove these two nuts. You may start with the bottom using a 6" extention + 12mm socket.
- The top one is easily accessible with a 12mm ratcheting wrench or a 3" extention + 12mm socket.

- With some wiggling, you are able to remove the Brake master cylinder assembly. Be sure to remove the proportion valve's rubber seal if its inside the brake booster because you don't want two of them when you install the new one. In this pic you can see where the MC was leaking fluid. In mine, it was coming out of the proportion valve going into the booster...

- A brand new Brake Master Cylinder. Remove those blue valve plugs and the yellow proportion valve cover. Now its time to bench bleed this thing.

- Bench bleeding is a mandatory process in order to remove all air present in the system. Think about a windex spray bottle. The spray system will not work until you pump the trigger a few times because air is still in the tubes. lol worst analogy, but you get the idea.
- Normally, in bench bleeding you will need to place this in a vice, then use your palm to thrust the proportion valve. It is very ineffective. We will not do this because there is a much easier way. It's not much of a trick but we will just install the new MC and use the brake pedal to bench bleed it. Gotta love how crx's have lots of space to work with. lol nissans.
Installation is just the reverse order. Replace the lock washers and nuts. Torque those to 15nm or 11lb-ft.

Once the MC is installed this is what you'll need. All it is just some aquarium tubing (ace hardware) and some glue stick nozzles(michaels/orchard supplies) Some MC kits come with it.

Fill the resevoir(max line) with your prefered DOT4 Brake fluid and completely submerge the aquarium tubes in the fluid. This will prevent air from entering the tubes when the brake pedal is released. Pump and release the brake pedal slowly down to 3/4 pedal. Try not to fully depress the brake pedal because you may damage the seals.

Remove the bench bleed device and re install the two brake line valve screws. (see pic1). Replace the reservoir strainer and top off fluid again. When replacing the cap, observe that the arrow is pointing forward, that is, away from the firewall. Lastly, reconnect the two electrical wires.
A good questions might come up: Should i use teflon tape on these connections to prevent leaks?
The answer is no. Brake Fluid eats up teflon tape. These connections are tapered so it will seal properly without any type of sealant.
Congratulations you have successfully replaced your MC. I recommend line bleeding each brake caliper to ensure the entire system flushed out. Although, you can get away with it just doing the MC. Not the best advice and I wouldn't recommend that especially since brakes is an important component keeping you alive. The proper bleed sequence Rear passenger, Front Driver, Rear Driver, and Front Passenger.

I hope that this tutorial will guide you the next time you need to replace your MC. I love reading your comments so please leave any feedback or anything that I missed.