Honda CRX Forum banner

wind's pop-up 86 CRX Si (Electric "Mid-engine" Vehicle)

322K views 506 replies 77 participants last post by  windraver  
#1 · (Edited)
Edit 2:
EV Conversion Update Pictures

Edit:
Since this thread is so long, this summarizes what's documented here. Lots of pictures.

This is a Frankenstein of:
Civic EK armrest/cupholders
2nd gen crx trunk divider
Civic vx D15z1 motor
EM57 Electric Motor
Leaf Battery Management and Inverter
24kWh Leaf Battery Modules (~92 miles range)
40kWh Leaf Battery Modules (~200 miles range)
Resolve-EV Controller
Civic 84 hatch trunk cover
Insight cluster
Some GM car's rear view mirror
Prelude seats
Integra flip lights/signals, part hood/fender
Civic Hx rims
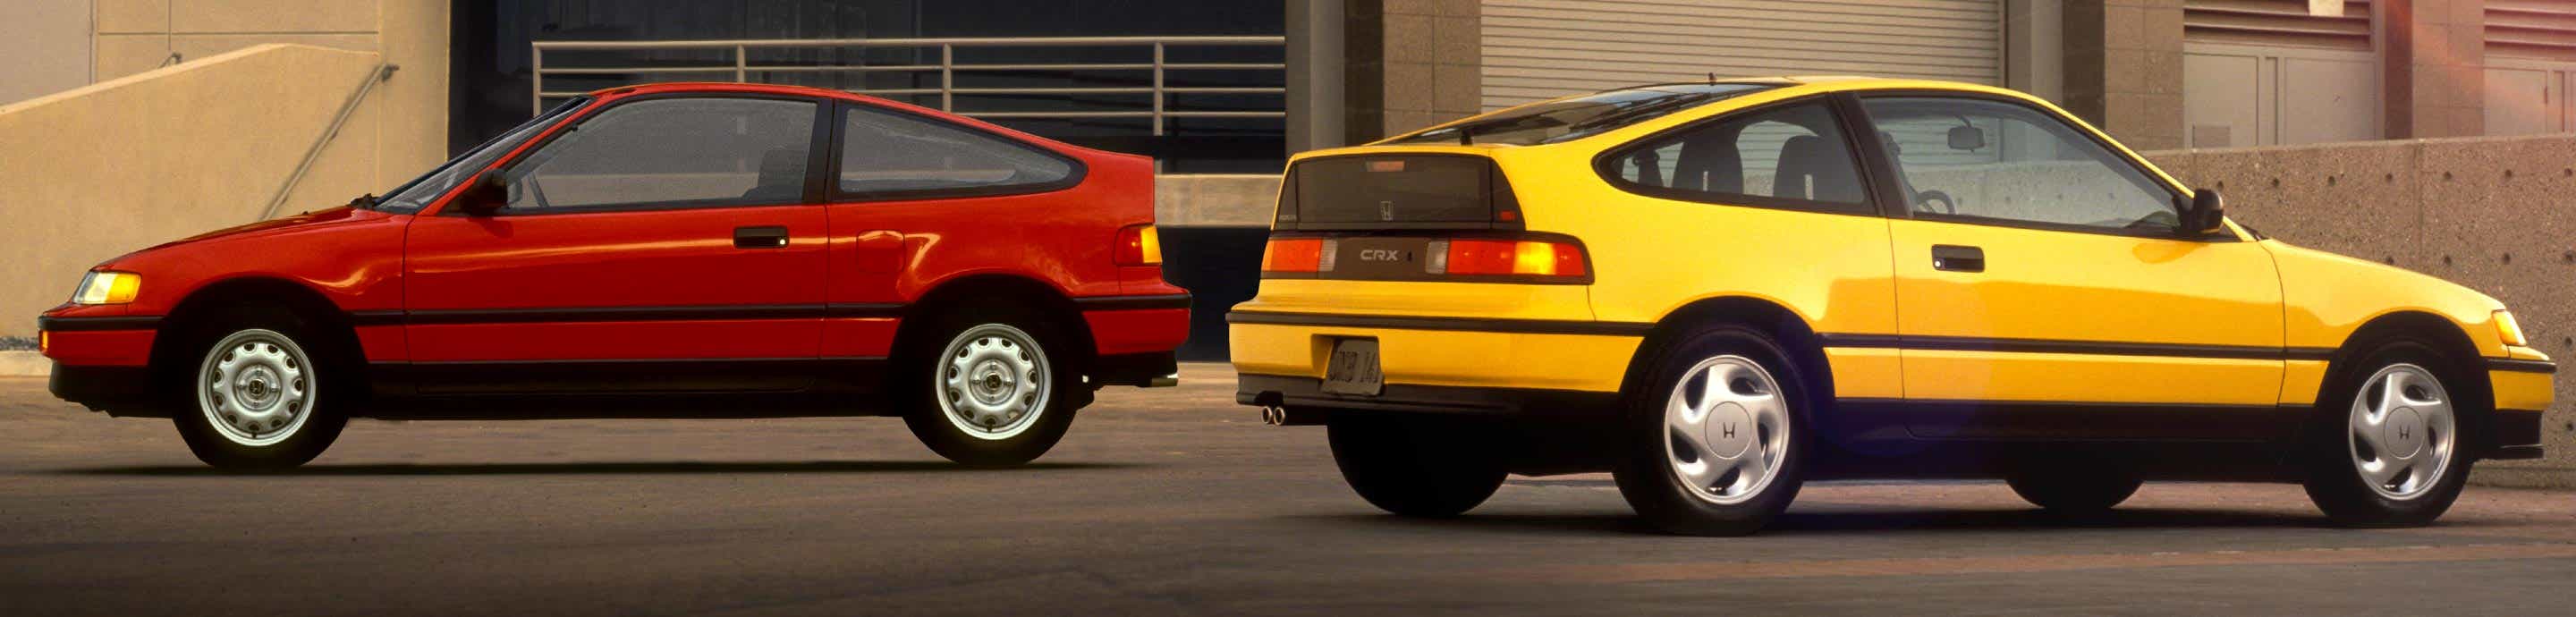
2 different 1st Gen 1986 CRXs

Have fun!

Original:
so back in july 26, 2007, some dude in milpitas california decided to give his 86 crx si for free on craigslist.

i showed up the next day with a borrowed truck and a rented dolly from u-haul and it was mine XD

the car was in pieces.. wasn't running... hatch wouldn't close, hood latch was broken... broken lights everywhere... engine bay looked like someone put oil in a water gun and had lots of fun and thats just the start

got it home, found a piece of rubber gasket that kept the hatch from closing... removed it and the hatch close normally again

put in another battery... car started... dead battery

found that the valve cover gasket was busted and spitting oil like insane

but for the mean, time, i put the project aside til october 2007

Image


Image


Image


Image


Image


Image


Image
 
#487 ·
Misc info for suspension.

I got the MEDIEVAL-PRO V2 DAMPER KIT BY TEIN with springs because the rear of my car is significantly heavier and I wanted to raise the height a bit where my springs and shocks weren't just fully compressed.

Well the Tein springs aren't really that tall even when adjusted to maximum height because this is for "lowering" the car when I'm trying to raise the car.

However these Tein springs are pretty standard sized so I found Eibach springs worked perfectly with more height

Eibach 250-70-0040 Coil Over Spring (ERS 250mm Length x 70mm ID).

Image


They both have an Inner diameter of 70mm. There are several heights available otherwise.

Image


Just an fyi for anyone who might need adjustable suspension but not exactly want it to be "lower".


Image
 
#492 ·
I've mostly been posting over on the DiyElectricCar forums since I've been doing EV related work but here are some updates.

First off, about August 2022, I fried my battery pack. I had one bad cell which went undervoltage, shorted the whole pack, and it started to smoke and sizzle but no fire.

With that, I had the car towed home and tore out the battery pack.

Image


Naturally... if the battery pack is out, its a good time to build a proper battery box.

So I did some planning, mocking out where the battery would go and if it'd even fit.

Image


The default 12 module stack wouldn't fit in the fuel tank area. So I needed to modify the pack and ironically, I already had the batteries laid out exactly as I would end up fitting them
Image


So I measured many times, planned and planned and cut a hole over where the fuel tank used to be.

Image


Our cars are mostly thin sheet metal with little structural integrity needed to support a 600lb battery so I knew I needed to reinforce the car and so what came next was a subframe.

Measure cut weld repeat.
Image


And so I had a lower subframe attached to the rear frame over the axle, the sides, and support for the front which was lacking.

Image


New batteries came in. 40kwh. 150 miles of range.
Image


Manually balanced all the cells to ensure they were as close in voltage as possible before installation.

Image


Then came the top subframe. Measure cut weld repeat.

Image


The top frame essentially clamps to the underbody subframe creating a solid box that will hold the battery and also stiffen the rear of the car.

Image


continued...
 
#493 ·
And then comes the actual lower battery box itself. plan measure cut weld repeat

Image


Since the battery layout is custom, the insultation covers had to be modified to fit. BMS wires had to be relocated. etc.
Image


Drop the 300 lb half battery in (it got stuck and didn't fit)
Image


Once I finally pry it into place with a lot of effort, I begin redesigning how the electrical will be handled
Image


I'd say its a good improvement.
Image


Second 300 lb battery stack goes in
Image


300lbs in.

Image


Hook up all the wiring and power test


Clean up tidy up weigh the car and see the difference

Image


Image

148lb difference but still 1000 lbs lighter than the 3,508 lb Nissan Leaf. Which means I should get even better range :cool:

Took a test drive


And finally built a battery box cover and redid my cargo cover. I have a trunk again!


Moving the battery in front of the rear axle centered the weight and especially with half the battery in the fuel tank area, the car feels very grounded. With the subframe and steel battery box, the battery doesn't sound "loose" or shift in any "scary" ways so its quite nice.

Being an EV, the torque is still quite insane and I have yet to have a sunny day to test so I don't know how well it'll pull but it'll be sunny hopefully soon.
 
#494 ·
Took pictures of the car. I think we like pictures :)

Image


Image


Image


Image


Image


Image


Image


Image


Image


Misc facts about this EV conversion since I get asked these questions a lot.

I'm running a 40kwh battery. In a Nissan Leaf its rated for about 150 miles of range.

The CRX with battery and motor is 2500lbs which is 1000lbs lighter than the 3500 Nissan Leaf.

Did a test drive last week and calculated 218 miles range based on my driving. It probably will vary depending on how aggressive or economic I drive.
(SOC = state of charge which is a measure of battery percentage)
Image


The motor is tiny and can probably fit where the fuel tank used to be in a CRX. So if someone is interested in building a RWD CRX, its very possible.

Also the motor stack is actually composed of 3 things
  • Motor
  • Inverter
  • Charger
All three can be separated and located where ever you have room in a car. The motor is smaller than the short engine block. The transmission is about 1/3 the width of the Honda transmission (single speed).

The power/speed of the car is based on Battery & Inverter.

Nissan Leaf had about 3 different inverters which means 3 different speeds. They all used the same motor.
Nissan Leaf had about 3 different versions of the PDM (Power Distribution Module), also known as the charger. This means you have 3 different charging speed options.
Nissan Leaf had about 4 different generations of batteries that work for this build: 24, 30, 40, 62 kwh. 24-40 kwh batteries are similar shape and layout and size and weight so its an "easy" upgrade for range. 24 (80 miles) - 40 (150 miles)

Upgrading this EV conversion is as simple as swapping one of the parts listed above. I thus have an upgrade path for speed/power via inverter. I have already done the battery upgrade from 24 to 40kwh. I can still upgrade charging speed as well by going to the 3rd gen charger for faster charging.

Brakes are currently vacuum boosted still. I currently am using a vacuum pump found in some other GM/Chevy vehicles. It is connected to a pressure switch so it only runs when the vacuum pressure is low. I also have a valve to ensure it stays under vacuum pressure when not in use. Note that EVs are extremely quiet so this vacuum pump is the loudest thing in the car currently.

And because the vacuum pump is obnoxiously loud, I plan to replace my brake booster with the iBooster. It is an electronic brake booster found in the Tesla as well as some CR-Vs. The model I purchased came second hand from a CR-V.

The EV conversion still uses a radiator but EVs run quite cool so it isn't enough to heat a heater core/radiatior in the car. I'm running the HF half radiator. The coolant cools the charger, inverter, and motor. It uses an electric water pump which is the second loudest thing in the car after the vacuum pump but it isn't as obnoxious. The water pump comes from the Nissan Leaf.

The conversion route I took is not actually meant for "speed" or "power" but for cost and "ease".

The average cost for an EV conversion is 15K+ if you're buying parts off EVWest. This is because you need: Motor, Inverter, Charger, Battery, Controller, etc.

The 2013 Nissan Leaf can be found locally used for about $5000 dollars (which is what I bought it for). A Nissan Leaf is a working EV with everything "needed". If you just want an EV then its cheaper and 1000x easier to just buy a Leaf. However I like the CRX and the Leaf doesn't look or drive as nice (my opinion). A leaf due to its age and range makes a great donor to convert a CRX or any car. Tesla donors are probably faster but expect to spend over 20k is what I'd estimate.

Other than the Leaf, you'd need a controller and I used the $800 Resolve EV controller. Its theoretically possible to just swap over all the internal of the Leaf and get it working but the Resolve EV is fully documented and simplifies the swap immensely. Why code and build your own ECU when you can just buy one that makes it almost plug and play? With this you can swap it into almost any vehicle whether it be golf kart, go kart, CRX, CRZ, etc.

Next depending on your transmission, you can go with the existing single speed (cheaper and more efficient as its gear ratio was designed by Nissan) or you can mate the motor with your own transmission. Mating with another transmission requires an adapter plate and a coupler. Both need to be fabricated but a company called https://bratindustries.net/ does half the work for you by making the Leaf side of both motor and coupler. If you want 4WD, mating is the way to go. The single speed is probably good enough for most people.

If you go with the single speed then you need custom axles. I welded my axles together and am in the process is getting the shafts I welded professionally made by a machine shop.

Then you need mounts. We're blessed by the Honda scene for most of our engine mounts to be made for just about every popular swap. That doesn't apply to DIY electric cars because its an emerging scene. Also depending on your build, you might not really want to mount the motor in front. The motor is pretty close to the size of a transaxle so its completely reasonable to fit the motor in the rear if you have the skills to swap over a rear suspension from another vehicle that supports RWD. Food for thought.

Overall a Leaf swap isn't the fastest but it can be done perhaps the cheapest and completed quickly in comparison to other EV builds. EVs are capable of instant torque and even though the Leaf is slower than the Tesla, its capable of up to 200 HP.

So all in all its a pretty good swap. Its possible to get free charging at many companies and schools. Range is good enough for a local daily commuter vehicle. Its fast.

Cons is that the weight of the car increases about 600 lbs. Rear cargo space is taken up by the battery depending on the design. If single speed then you might miss the shifter. Its too quiet so you can't rev at people (working on fixing that).
 
#495 ·
Picking up a LFP 12v battery from Ohmmu.


It says Toyota Prius but its effectively a group 51 size battery. The Insight battery on their site is group 51R with the terminals reversed.

11lbs for LFP vs 26 lbs for an AGM. Capacity is also over 40AH vs the 38AH AGM battery.

Only "unknown" is how it'll handle with an internal combustion engine since EVs don't have a "starter" while ICE does. Starters consume a large amount of power initially when cranking so I don't know how this will perform for others but its worth considering if you're looking for high capacity as well as weight savings.
 
#497 ·
Now for the real update. I'm working on my brakes.

To start, I'm replacing my vacuum based brake booster with an electronic brake booster called ibooster. Its made by Bosch and the gen1 variant I have was used in the CRV as well as several Teslas.

You can read more about it here:

Here are some parts I sourced ahead of time including the brake booster.

Image


Since I'm running electric, I removed the vacuum pump and pressure switch.
Image


Drained the system
Image


Coincidentally, the bolt pattern is the same!?
Image


Image


So first thing I did was remove my old brake booster and tried to test fit the ibooster
Image


Unfortunately the bore of the booster was a bit too big. And also the bolts were 1cm too short. Also the circular shape didn't match the firewall either so I had to trim it.
Image

Pressed out the studs and trimmed the plate to fit the firewall. Also widened the hole in the firewall to fit the bore of the booster. It was probably 1-2 mm of widening.
Image


Welded in longer studs.

Also the brake pedal bracket/clip was 1 cm too short. So I welded an extension. (I trimmed it down a bit from the image below)
Image


And it bolts right in now. Had to bend the brake lines and add adapters since the Master Cylinder ports are a different size.
Image


To be continued.
 
#498 ·
Continued...

And thus the curse begins. I was thinking.. I need to put in brake fluid and bleed my brakes... so I should do other brake work right?

Like rear disc brake? 😂

So I searched a bunch of yards, drove 2 hours and got myself some disc brakes from an integra. To be exact I drove 5 hours because I drove 2 hours through traffic to pick n pull, arrived at 5PM, dropped the rear axle, got kicked out of pick n pull because they closed before I could buy the rear integra axle, I drove home 1 hour, got up 630 AM next morning and drove another hour back on Saturday morning, retrieved my rear axle from the integra and drove home another hour. We do some damn crazy stuff for these cars I swear...

Anyways, here it is, 1989 Integra Rear Axle with Disc brakes.

Image


And so I started another project lol

Took it home, ordered rotors, new calipers, pads, wheel hubs, hoses, parking brake cables, shims, clips. Anything I can get new, I bought off rock auto.

And then started disassembling the rear axle at home
Image


And finally got to one of the key parts. The bracket that holds the calipers. Can't buy this anywhere supposedly..

Image


One of the machine screws holding the rotor to the wheel hub is stripped... oh well, I was going to replace the rotor and hub anyways.
Image


What I didn't realize yet is I needed the studs off the rear axle. Integra studs are longer so they can hold the bracket. Probably possible to substitute but worth noting. Also these brackets are really simple... If someone really took the time to fabricate these, it would be possible for others to get rear disc brakes without having to source an integra!

Oh turns out there is a way! But they're out of stock? Honestly its pretty simple when I get into the details... Just need someone to cut and drill the plates and make the brackets. A simple machine shop should be able to do it.

Calipers can be bought on Rockauto along with rotors and pads. everything else just hooks up. If the plate isn't too thick, there won't be a need to get longer studs either or just hammer out the studs and replace them with longer bolts.

Anyways, I cleaned the brackets and put rust converter on them.

Before
Image


After
Image


Remember these studs? Yea, the CRX studs are too short. You need to use the integra ones. Hammer them out.
Image


Both Integra and CRX spindles are the same size and shape btw. At least on the driver side. The passenger side is different as they have studs.
Image


Here you can see Integra Studs on the left are bigger than CRX studs on the right.
Image


I pressed them in with a simple clamp and when I bolted them, they pressed in all the way.
Image


to be continued...
 
#499 ·
Integra Rear disc brakes continued...

Parking Brake cables are not compatible. Integra brake cables are often noted to be too long. Some people work around this by running left and right across from each other or getting creative with how they run it. Also the Del Sol cables are compatible so thats an option as well. Either ways, gotta remove the CRX parking brake cable and replace it. Cables are sold on Rockauto I found.
Image


Note the wheel hubs are different since one has holes to bolt the rotor to. They come with the wheel bearing. Good time to replace the wheel bearing at the same time. These were also available new on Rockauto so I ordered replacements for them.

Image


Also the Integra wheel hubs have longer studs (for the rotor)
Image


Longer integra studs in.
Image


And then the curse hits again... why don't I replace the bushings for the control arms while I have it almost off... lol

So I took off the control arm.
Image


I had bought that kits years ago... just never installed it because... its a lot of work.
Image


And it was a lot of work. :(

It took me 2 hours to actually reinstall it back into the car...

Popping out the old bushing wasn't hard.
Image


Installing and greasing the new bushings was too bad either.

Image


But putting in the bolt... cursed thing just wouldn't line up for 2 hours. And when it did... it cross threaded and jammed. So I had to take it all apart and fix the threading and try again.. and again.. and again..

Image


2 hours later I finally got the bolt in.
Image


to be continued... (10 picture limit)
 
#500 ·
continued...

The brackets are now dry and rust free.
Image


Bolted it on.

Image


And I have to stop here because next is the wheel hub/bearing, rotor, and calipers, which are all parts I order from Rockauto (ETA next weekend at earliest).

And so I started the other side. Starting with disassembly.

Image


The spindle on this side is integra specific because it has longer studs for the bracket. It doesn't seem like the studs can be hammered out either. Main reason is the bracket is thicker than the drum.

Also removed the control arm and changed the bushing but I'll have to redo it because the bolt cross threaded again... painful.

I left it like this for now. I'll finish it next week when I have all the parts.

Image
 
#501 · (Edited)
Putting credit where it's due, I got my instructions on how to do the rear disc brake from:


tldr that I learned is you need from the Integra:
  • brackets for both sides that hold the caliper
  • studs off the dead axle for drivers side
  • spindle which includes studs on the passenger side
  • Proportioning Valve as brake pressure for drum and disc are different

The rest you can buy new off rockauto:
  • rear rotors
  • calipers
  • del sol parking cables
  • brake rotor screw are m6 1.00 x 25mm machine screws
  • rear brake pads
  • shims
  • wheel bearings and hubs
  • Brake line hoses

I'm currently waiting for those parts to arrive so I can install them.
 
#502 ·
Some parts came in so I installed the wheel hub, rotor, and caliper. Had to take off the bracket and remove the holder for the brake hose off the trailing arm since it blocked the caliper.

So first off, new wheel hubs and bearings.

Image


Before installing the bearing, take back off the caliper bracket and slide the bolts for the caliper. There won't be enough room otherwise as the Integra trailing arm has a hole for the bolt but the CRX doesn't.

Image


Now install the wheel hub and bearing (note the bolts are not on here yet because I didn't know when I took this picture earlier.
Image


Put in the washer that holds the bearing and put on the axle nut.

Next put on the rotor. Screw it into the wheel hub.

Image


Thought it should mention that I bought new "screws" to screw the rotors into the wheel hubs. Mainly because the screws kept stripping and slipping.

So I ordered m6 1.00 x 25mm machine screws and replaced all my rotor screws.

New screw is black. Here you can see both of them before I replace the other.

Image


Image


I went with hex since it's easier to remove and tighten.
Image


Next is the caliper. It's worth noting that some come with the parking cables bracket and some don't when you buy the caliper from rock auto. The FVP caliper didn't have the bracket but the Centric caliper did.

Image


Caliper side by side.
Image


Caliper comes with hardware to how the pads in place as well as a new screw for the brake hose.
Image


To be continued...
 
#503 ·
And the pads are in

Image


Repeat on the other side.

Image


Brake hoses that Rockauto sent were the wrong hoses. So I went ahead and ordered stainless steel hoses from Heeltoe

I still need to install the parking brake cable as well. Also waiting for a proportioning valve to come in.

Also need to run power for the electric brake ibooster

Once those are in then I can put in brake fluid and bleed the system.

Almost there.
 
#505 ·
I've been humoring and researching the possibility of changing my CRX, again, into a mid "engine" RWD. I'm only "allowed" one project car and I'm not about to give up my CRX after so many years of working on it.

Currently the EV motor is in front and the vehicle is FWD. FWD works best when the weight ratio is 60:40.
Image


Unfortunately for me, the current real ratio is closer to 50:50 with slightly more weight in the rear than front. This is terrible for traction.

These are estimates and numbers I estimated before the project and the real measurement numbers below. (The estimates were pretty close)
Image


Now if I made the car RWD, in whatever way, it would amusingly improve traction. And another thing to consider is I don't have the same "issues" that regular combustion engines have.

Specifically, the Electric motor is extremely light in comparison and can be "separated". In ICE terms, its like being able to separate the block from the head and placing them in different places in the car. They're connected by some 0/1 gauge cables. 3 between inverter and motor, 2 between PDM (Power Distribution Module) and Inverter. 2 between battery and PDM.

This allows me to move my weight around as long as there is "space" to do so.

So with that in mind, moving the motor to the rear, and batteries forward, will actually leave my rear "lighter".

For example, if I move motor back and half the batteries forward, I'd have 50:50 weight ratio with RWD:
Image


If I leave the inverter and PDM in the front, and there is definitely space to leave both along with half the batteries, it'll put the weight slightly heavier in front and minimize over steering issues that mid engine cars have:
Image


Essentially the batteries are the heaviest part of the car. I could move them all to the front, put the PDM in the back, and it'd be front heavy 60:40
Image


I probably wouldn't go this route but it goes to show the "flexibilities" and options I have.

Now the biggest decision I need to make is what to use for the rear suspension and wheel hubs. As is stock, the CRX rear axle won't work. Its a solid dead axle.

For those who have followed on FB, I've been collecting mid engine, AWD, and suspension details to research what path I want to take forward.

Here are some inspirations I've found:
A company that does Mid engine conversions:

Project Becky:

RWD Del Sol:

Mid engine eclipse:

And more.

So the big question is, what suspension do I want in the rear of my CRX?

Do I go with a Miata or MR2 rear subframe? I would need to adopt their suspension naturally. I'd also have to deal with the width differences and alignment challenges.

Do I go the "install the front suspension in the rear" route which would be equivalent to installing practically what I already have, in the back? That would likely reduce the overhead by a lot but do I want to proceed with my 1G torsion bar suspension in the rear?

And finally, should I even do this at all? Some say my car is good enough, stop. But they said that before half of my crazy projects. Still researching but I'm strongly considering this mid engine project.
 
#506 ·
So I'm doing a MR conversion :)

I have picked up some months back the front suspension to a 1G CRX

Image


I've also since planned out that the rear suspension and motor will be like this
Image


While I have the motor out, I'm also upgrading the inverter and charger. Upgrading the inverter will bring me from 110HP to 215HP. The motor is identical so I'll keep it as spare parts.

Image


I started yesterday by pulling out the wheel hub on the rear (actually front) and I've already bent my wheel hub and bearing puller... :(

Image


Washed off the grease and scrubbed as much rust off as I could.

Image


Then I sprayed it with rust reformer. Now its ready for a new bearing and hub.

Image


I stopped taking pictures at this point because I messed up and put in the hub before I put in the snap ring. And pushing out the hub against caused the bearing to come apart.... so I'll need a new bearing.
 
#507 ·
Just occurred to me I've forgotten to update this thread.

After a month of effort last year, the CRX got a new rear torsion bar suspension, reinforced frame, and a "mid-engine" electric motor.

I probably would have finished... but then I redesigned the battery pack and since then its been 1.5 years.

Some pictures.

First I added some really thick steel... so my frame actually became straighter... its both bolted and welded in.
Image


Some aftermath. That connects to a rear bar, which I put in to support the rear motor.
Image


The suspension was the fun part:
Image


Motor installed
Image


Electric, unlike internal combustion, can be separated into components that are connected by wires. So with that I'm able to make it almost seem "flush"
Image


Even has enough room for the inverter next to it:
Image


Battery is split 50/50 half front half back. Heres the front without the PDM yet.
Image


Front is all wired and coolant connected.
Image


Scope leap, is this rear battery pack. I'm still rearranging it to maximize space. Been busy so its work in progress...

Image


Power test was confirmed:

Rear brakes were also reinstalled:

The end is near but I've been busy.